Happy 2014! I loved 2013 but am really looking forward to 2014 – my self-proclaimed “Year of Fun!” It’s always great to look back at the previous year and this blog helps keep some of those fun memories for me. Based upon your views and clicks, it is safe to say this year was the year of our master bedroom. We finally finished all of the big projects I wanted to complete and you all loved them with me! Below are the top five posts from 2013.
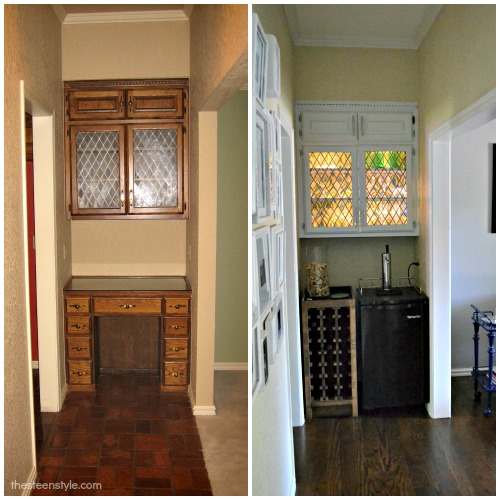 Conner’s favorite makeover in our house is this bar area, especially the stained wine cabinet from our 5th anniversary. When we moved in, we knew right away that the desk would have to come out (can you say junk collector?). New floors, new paint, an updated cabinet as well as two new beverage centers really make this spot more us!
 I love that we finally have grown-up nightstands! Conner’s nightstand was tricky with that stupid floor vent but we worked it out and I love it.
 Every girl’s dream – a full-length mirror to see her shoes! This DIY floor mirror took some time (mainly for drying, but really for silver-leafing) but it was so worth it for the end result and the space it takes up on this empty wall.
 The second most favorite post/project of the year is our tufted headboard, inspired by West Elm and featured on BuzzFeed! (What a thrill and lesson learned…don’t read comments you can’t delete!) Mom and I worked all day on a Sunday to get this over-sized beauty finished and I love it so much.
 And finally, your favorite project and mine…the DIY mirrored nightstand on my side of the bed. I had been dreaming of doing this for two years and am kicking myself for not doing it sooner. It is so easy and not as expensive as I feared!
Thanks for reading in 2013! I will be back soon with new projects. For more in between posts, follow me on Instagram and like the Facebook page!


You must be logged in to post a comment.